
The essential, 5-piece no-fluff nail kit for the perfect DIY manicure every time.
I don’t love doing my nails.
I don’t find it relaxing. I don’t enjoy waiting for them to dry. And I have very little patience for anything that requires perfection on both hands.
But I do love how a finished manicure looks.
That’s why I eventually put together a simple lineup of tools that gives me clean, polished nails without spending two hours, or $90, at a salon.
After trying far too many products (and sitting through more tutorials than I’d like to admit), I realized the secret wasn’t getting better at doing my nails. It was finding the handful of manicure essentials that actually make a difference.
It’s a small system with a surprisingly big payoff.
A few intentional tools and a simple method. Suddenly, your nails look clean and elegant, whether you’re headed to dinner or answering emails from the couch with a pen holding up your messy bun.
Honestly? Put that salon money in your Roth.
What Actually Belongs in Your Nail Kit
You do not need a drawer full of professional nail tools to get a refined manicure at home.
These five essentials create the biggest visible difference in how your manicure looks and wears.
Starting from scratch? Buy the glass file, ridge-filling base coat, and top coat first. Those three create the biggest visible upgrade for the least amount of effort.
✨ This post includes affiliate links, which means I may earn a small commission if you purchase at no extra cost to you. I only recommend what I personally love and think you will too. As an Amazon Associate, I earn from qualifying purchases.
The Foundation of an Elevated Manicure
For years, I thought I just wasn’t very good at doing my own nails.
So I’d redo nails. Fix smudges. Add thicker coats to “even things out,” which somehow made everything worse.
The turning point wasn’t getting better at painting.
It was realizing that an expensive-looking manicure has very little to do with skill and almost everything to do with prep.
Most at-home manicures don’t fail because of the polish color. They fall flat because a few small details get overlooked.
Individually, these seem minor. Together, they create the beauty-school-dropout effect.
Here are the details that take your manicure from sloppy to first-class:
The Surface
A rough or uneven nail surface makes polish appear patchy and highlights every imperfection.
A smooth, uniform nail bed creates the foundation for a salon-quality result.
The Cuticles
Even beautiful polish can appear messy when it’s crowded by overgrown cuticles.
Neat cuticles create clean lines and make the manicure feel intentional.
The Layers
Thick coats take longer to dry, show dents more easily, and tend to chip faster.
Thin, controlled layers create a smoother, more perfected outcome.
The Edges
Nothing gives away a DIY manicure faster than polish flooding the sides of the nail.
Clean edges instantly make your manicure read as more precise and professional.
The good news? None of these fixes require pricey products or advanced technique.
They just require the right tools.
✨ Save this for your next at-home manicure because “I tried” nails and “they look done” nails are not the same thing.
The 5 At-Home Manicure Essentials That Make the Biggest Difference
You don’t need a bin full of products. You need high-quality tools that actually make a visible difference. These are the ones I use on repeat; the rest is noise.
1. Glass Nail File
The Secret to a Fray-Free Base
The shape sets the foundation. If the edges are rough or uneven, your manicure will never come off as next-level.
Traditional files leave tiny tears along the nail edge, leading to snagging and a slightly frayed appearance that simply ruins everything.
My Take:
I used to dread filing my nails. The texture alone made me avoid it. Then I switched to a glass file and never went back.
It buffs instead of shreds. My nails don’t catch on anything anymore, and the shape reads as refined with almost no effort. I’ve converted multiple people to these, and they all say the same thing: once you use one, you’re done with the old kind.
Picks: Mont Bleu Glass Nail File Set (my go-to) or Bonafide Beauty
2. Liquid Cuticle Remover
The Easiest Way to Get a Clean, Salon Edge
This is what prevents that slightly grown-out appearance, even on day one.
Without it, polish crowds the edges, and the whole thing feels slightly off, though you can’t immediately tell why.
My Take:
I’ve used the same cuticle remover for years. It’s inexpensive, it works, and it lets me skip cutting entirely, which is a hard no for me.
This is one of those tools you don’t think you need… until you use it. Then you realize it’s doing a lot of the heavy lifting.
Picks: Sally Hansen Instant Cuticle Remover or Butter London Melt Away
3. Ridge-Filling Base Coat
The Essential for a Level Surface
If your nail surface isn’t smooth, your polish won’t go one smooth. It’s that simple.
Without it, you get subtle ridges and a bumpy appearance, the kind of thing that makes a manicure look less than great.
My Take:
This was newer to my routine, and honestly, it made a bigger difference than I expected.
It is a quiet upgrade, but the difference is obvious the second you finish painting.
If you prefer a minimalist approach, a tinted ridge filler or one of these sheer nail polishes is the low-effort manicure, “your nails but better” move you’ve been searching for.
Picks: Londontown Fortifying Ridge Filler or Sally Hansen Color Therapy
4. Clean-Up Brush
The Tool That Makes It Look Professional
This is what separates a manicure that seems amateurish from one that likely required an appointment.
Even slightly messy edges will undo all your effort.
My Take:
I don’t have the steadiest hands, and this completely changed the game for me.
I use a mini concealer brush with remover to clean up the edges, and it instantly makes the edges snap into focus. It is a ride-or-die tool for me.
If you already have one sitting in a drawer, try it. If not, it’s worth having one just for this.
Picks: Wet n Wild Small Concealer Brush (what I use) or Olive & June Clean-up Brush
5. Glossy Top Coat
The Key to an Expensive Result
Shine matters more than color.
A good top coat softens everything out, delivers a high-shine, jelly-like plumpness, and helps your manicure last longer. Without it, polish reads flatter and wears down faster.
My Take:
This is what pulls everything together.
I always go for top coats that give that glossy, slightly cushioned effect, like a gel manicure without the UV damage. And I want it to last.
If I’m doing my nails, I want more than a couple of days out of it.
Picks: Essie Gel Couture Top Coat or Seche Vive Gel Effect
If you’re starting from zero and want to keep this simple, focus on the glass file, the ridge filler, and the top coat.
Those three handle the structural heavy lifting.
The cuticle remover and clean-up brush are what take you from “nice DIY” to “salon-level.”
Start with the essentials and add the precision tools once you see the difference (and you will).

What You Don’t Need in Your Home Manicure Kit
One of the easiest ways to waste money is buying nail care tools you will rarely use. For most people, a few well-chosen essentials make a bigger difference than a drawer full of specialty products.
| Worth Buying | Skip for Now (Likely Forever) |
|---|---|
| Glass Nail File | Electric Nail Drill |
| Ridge-Filling Base Coat | Nail Art Tools |
| Quality Top Coat | UV Lamp System |
| Clean-Up Brush | Large Manicure Sets |
A beautifully curated setup does not need dozens of products. In my experience, the tools that improve nail shape, polish application, and shine are the ones you’ll reach for again and again.
My Simple DIY Manicure Routine
(Simple, Repeatable, & Actually Works)
This isn’t about perfection. It’s about a few small habits that make everything cleaner and last longer.
This is the exact method I use when I want my nails to look like I spent the morning at a salon.
Once you have the right tools, this is the part that makes them work.
Prep Your Nails
Start with clean, shaped nails.
Use your glass file to fine-tune the shape, then apply cuticle remover to gently clear away excess buildup. Nothing aggressive, just enough so the polish has a clean space to sit.
This step does more than you think. It sets the tone for everything that follows.
Apply Thin Layers
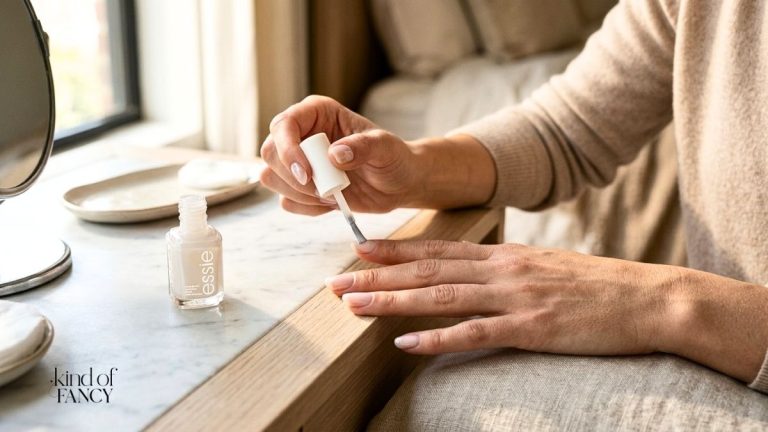
Apply your base coat, then build your color in thin layers.
Resist the urge to fix everything in one pass. Let each coat do its job.
This is what gives you that sleek, pro finish and helps everything dry faster.
If you love that soft, clouded aesthetic, this is exactly how you get it with the best milky pink nail colors in my rotation.
Clean Up the Edges
This is where everything starts to look pristine.
Use a clean-up brush with a small amount of remover to sharpen the edges. It takes seconds, but it makes a visible difference.
If your hands aren’t perfectly steady, this step removes the pressure of getting it right the first time.
Seal Everything In
The final touch is your top coat to lock in your color and add shine.
Then, give it a little time.
Not forever. Just enough so you’re not undoing your work five minutes later.
This is what locks everything in and gives that final, polished result.
The One Extra Product That Makes Every Manicure Look Better
If there is one thing that keeps your hands looking put together, even when your manicure isn’t perfect anymore, it is cuticle oil. Nail oil keeps everything looking healthy and well cared for.
I use jojoba oil because it absorbs well and doesn’t sit on the surface. But honestly, most simple oils do the job. This doesn’t need to be fancy; in fact, I prefer ones with fewer additives since it’s going directly into your skin.
It takes a few seconds and a couple drops to make your hands appear noticeably more cared for. When you combine healthy cuticles with nail colors that make your hands look younger, the overall effect is an instant, effortless glow-up.
Pick:
- Cliganic Jojoba Oil (simple, effective, a bottle lasts)

How to Make Your Manicure Last Longer
If you’re going to take the time to do your nails at home, you should actually get a few days out of it.
These are the things that make the biggest impact (for too many years to count).
Wear Gloves for Dishes
This one is non-negotiable for me.
Hot water breaks down your manicure quickly and dries out your hands at the same time.
Wearing rubber gloves makes a noticeable difference. Every time I skip it for a few days, I see it immediately.
It’s a simple change that will have you asking, “Why didn’t I do this sooner?”
Be Mindful Early On
Right after doing your nails is when they’re most vulnerable.
Try to avoid:
- hot water
- heavy use
- anything that puts pressure on the nail surface
Give them a little time to fully set, and your manicure will last much longer.
Reapply Top Coat (Optional, but Worth It)
If you want to extend that freshly-done-effect, adding another thin layer of top coat after a few days helps refresh the shine and protect the color underneath.
Not required, but it works.
It is one of the easiest ways to keep your nails looking mint without starting over from scratch.
The Bottom Line
You don’t need more products.
You don’t need to “get better” at painting your nails.
You just need a few tools that actually do their job and a simple way of using them.
That’s the shift.
Once you have the right setup, everything feels easier. Polish glides over the nails. The edges are defined. The whole thing looks elevated with less effort.
And you stop redoing your nails… or avoiding them altogether.
It’s a small shift. But it’s one of those details that makes you feel more put together every single day, and who doesn’t need that!
Get the Kind of Fancy Edit
If you liked this, you’ll like my monthly Kind of Fancy Edit — a tight curation of cozy-luxe finds, good ideas, and things currently on my radar. Not more. Better.

Welcome to Kind of Fancy—a trusted edit for women who appreciate beautiful things. We compare, question, and narrow the field so you can shop with confidence, not overwhelm..
See what we’re about→